Detailed Installation Process of MRT: ① Installation of MRT card & how to connect a disk to MRT hardware card
|
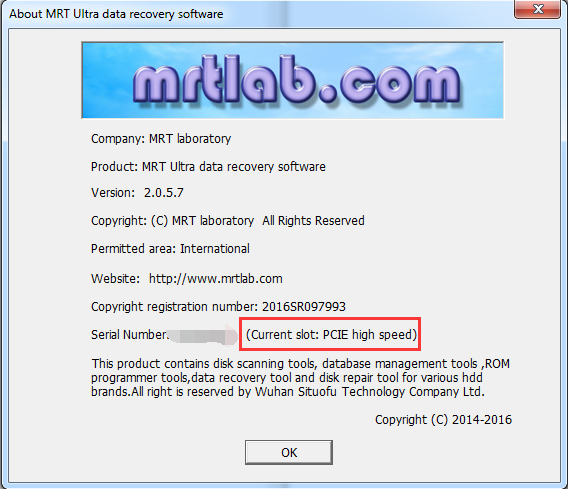
Detailed Installation Process of MRT: Installation of MRT card & how to connect a disk to MRT hardware card During the installation of MRT, users may encounter some problems. This document describes the installation process of MRT in details, as well as how to eliminate common problems during installation to help users install and use MRT in a correct way. After receiving MRT data recovery tools, you should plug MRT hardware card into the PCIE slot of host, not the PCI slot. PCIE slot is evidently different with PCI slot in appearance. It is easy to recognize. Generally, there are several PCIE slots on host, such as a plug PCIE 16x slot for video card and ordinary PCIE 1x slot. In fact, PCIE slots are backward compatible, so you can also plug PCIE 16x devices into PCIE 1x slot. The interface of MRT Pro & MRT Express is standard PCIE 1x, so they can plug into any kind of PCIE slot( no matter 1x or 16x PCIE slot) while the interface of MRT Ultra is PCIE 4x, and in general there is no PCIE 4x slot in mainboard, so MRT Ultra can only be plugged into PCIE 16x slot. Some users may have a concern that there would be performance difference of MRT card when it is plugged into PCIE 1x and PCIE 16x slot. Actually, due to the backward compatibility of PCIE slot, there will be no difference in performance. However, we need to notice that differences of PCIE slots not only lie on the width but also the version. Now there are version 1.0 and version 2.0. The higher of the version, the faster of the speed. MRT Ultra owns a ultimate performance which can support PCIE 2.0 verison, so the transfer speed will be fastest when Ultra is plugged into PCIE 2.0 slot. To see whether MRT Ultra is plugged into PCIE 2.0 slot, we can click "Help"->"About Mrt"
In the dialog box it will show whether this installed Ultra is in high-speed PCIE slot or not. And if it is installed in low-speed PCIE slot, it can not give full performance, and we would like to suggest you to change the mainboard to which can support PCIE 2.0.
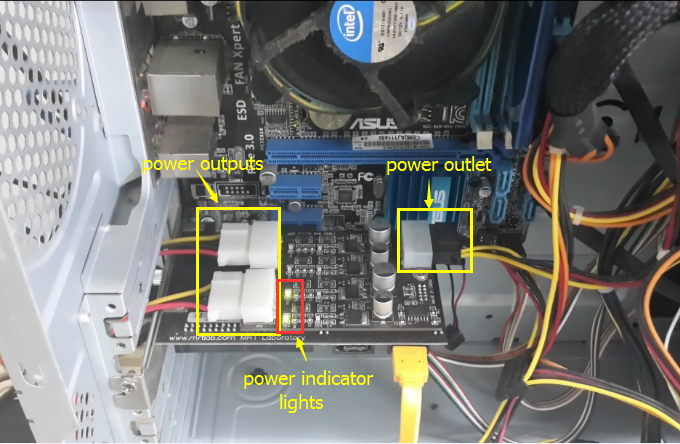
MRT Pro is plugged into host
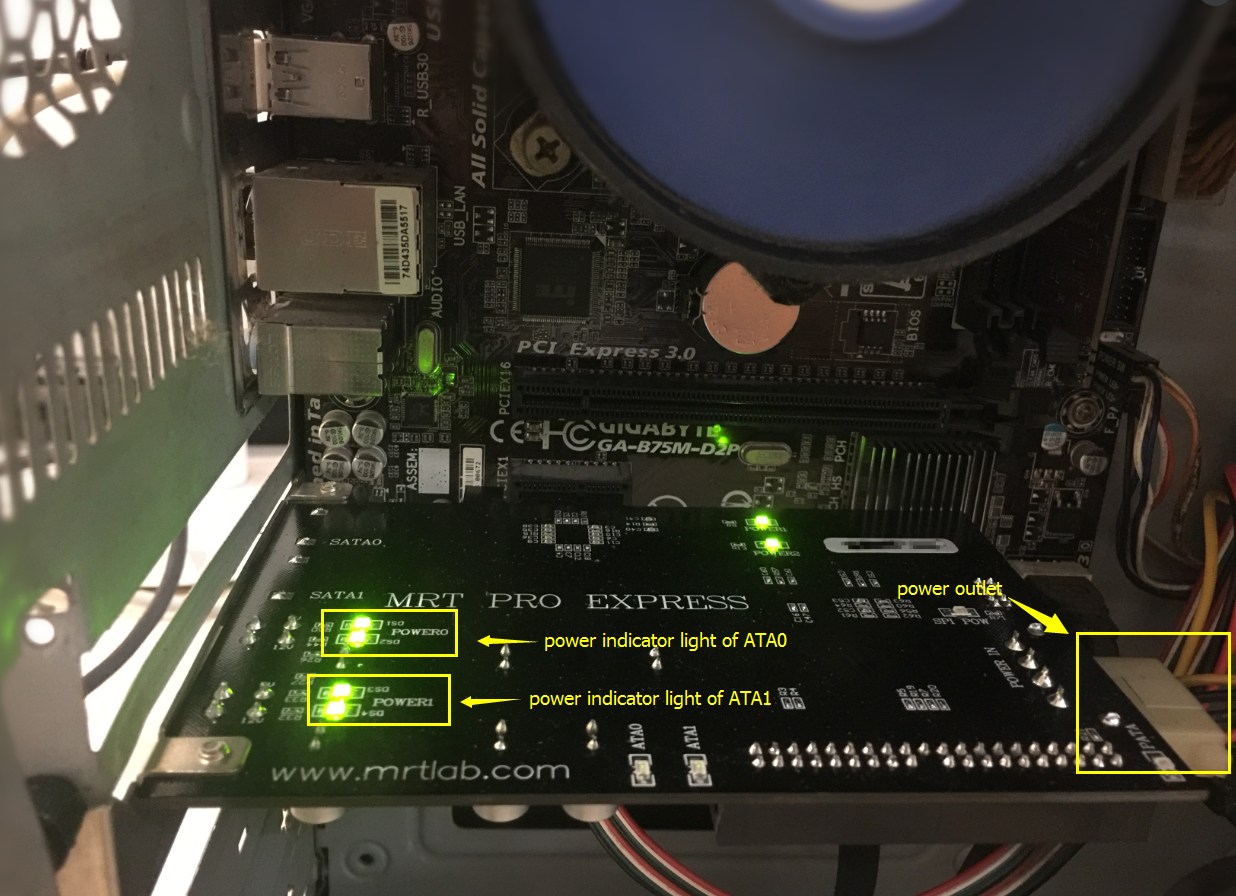
MRT Express is plugged into host
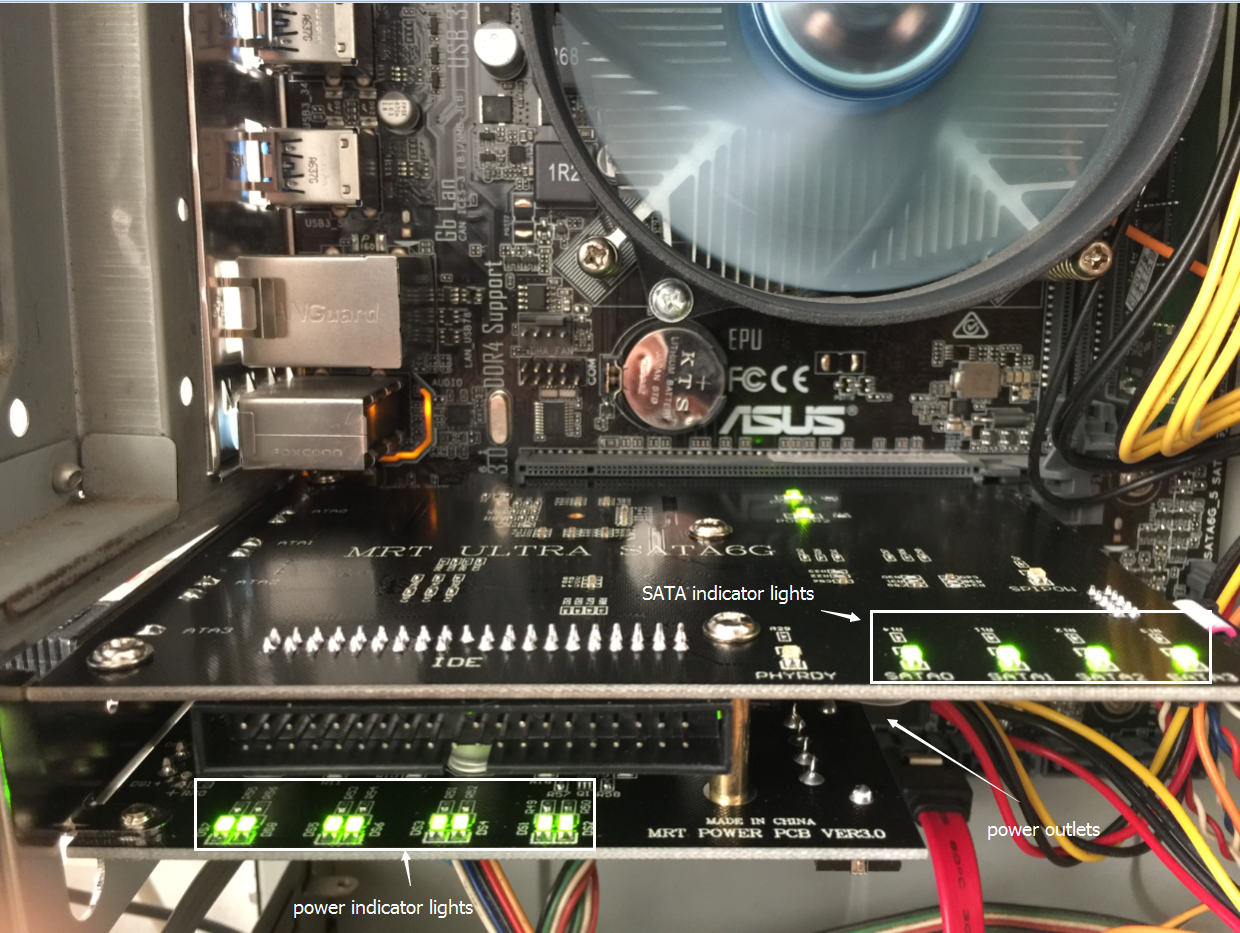
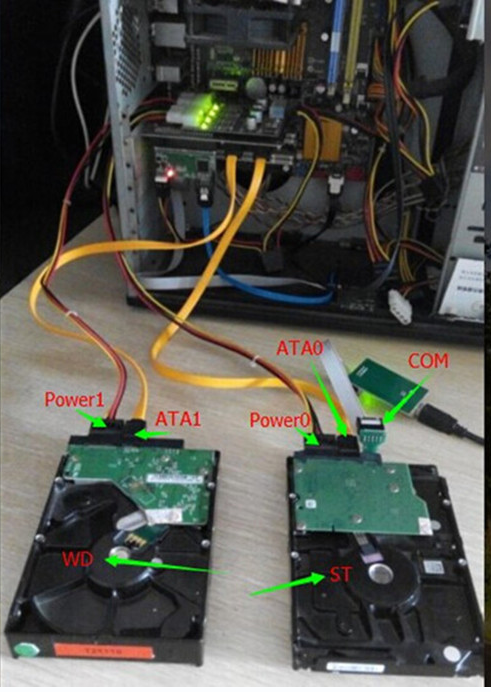
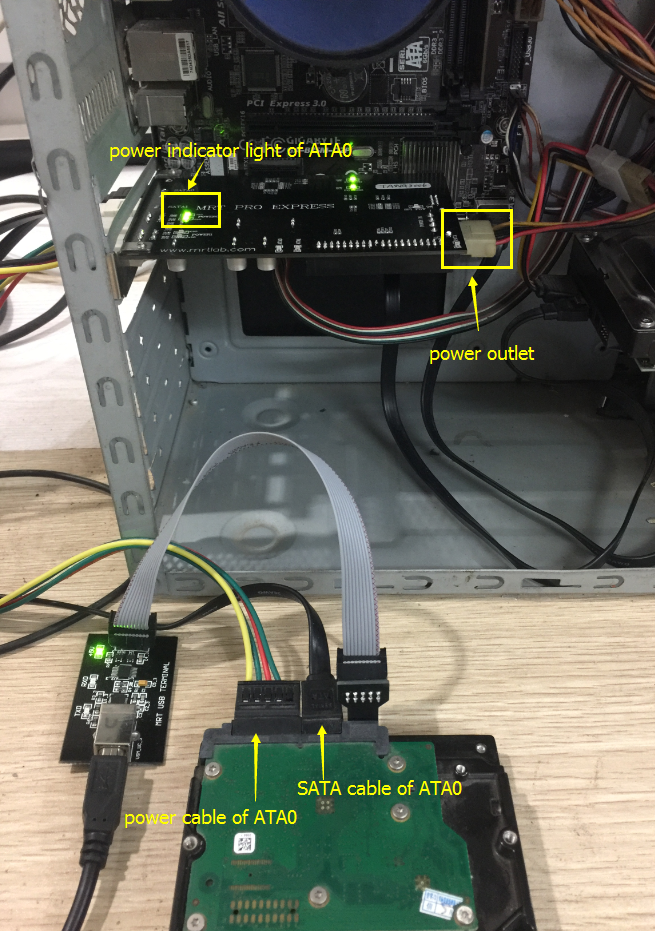
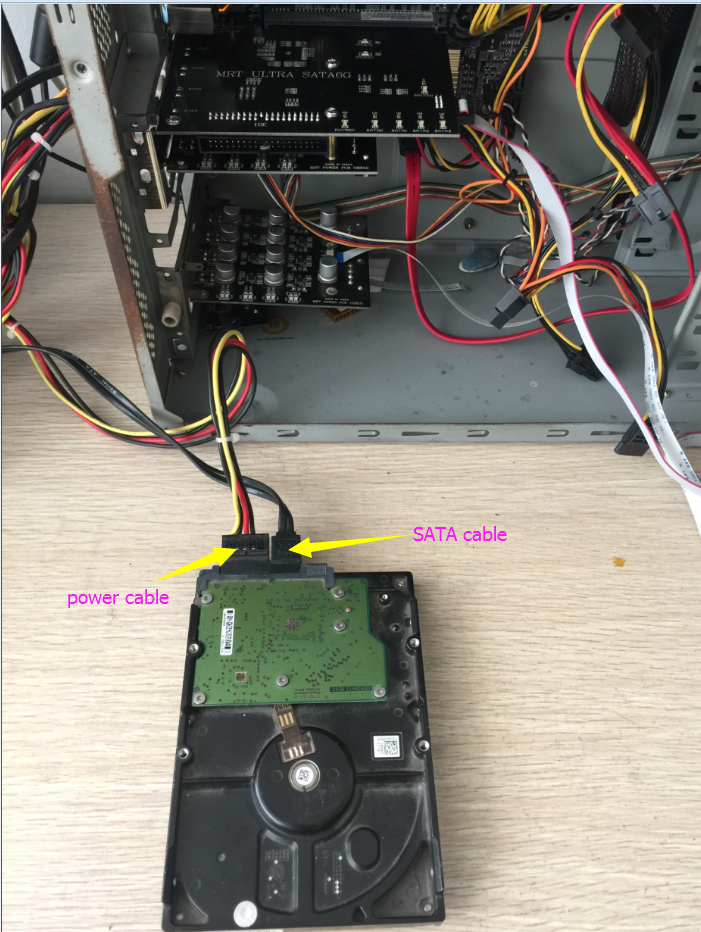
MRT Ultra is plugged into host From these three pics above, we can see that the power outlet on the right side of MRT hardware card should be powered from host's power supply. Both MRT Pro and MRT Express need one power supply from host while MRT Ultra needs two of them. At the same time we can see that there are power outputs on the left side of MRT hardware card, which are used to supply power for HDDs to be repaired. There are two power outputs on the left side of MRT Pro & MRT Express while there are four power outputs on MRT Ultra. And when we power on in the software, we can see the power lights on MRT hardware card will light up. For MRT Pro, of the two power outputs, the outlet facing the inside of host corresponds to ATA1 , the one facing the outside of host corresponds to ATA0, but for MRT Express & MRT Ultra, the order is reversed. And we can get the detailed information about the power supply and SATA interface from MRT hardware card. After proper connection, fix the card with screw. Then the installation of MRT card is completed. And now we can boot the computer and install the software. When both the hardware & software are installed successfully, how do we connect a HDD to MRT hardware card? The answer is that we need to use SATA and power supply cables. And in general, the interface of ATA and the interface of power supply should be consistent. For example, that is to say, when the disk is powered from the power supply of ATA0, then we need to use the SATA cable from ATA0 too. When HDD is connected to MRT hardware card:
MRT Pro
MRT Express
MRT Ultra PS: mainstream HDDs such as Seagate will frequently use terminal serial port in practical cases, this is the manual of how to correctly use them: https://us.mrtlab.com/tech/seagate/59.html In the end, I'd like to add that there is one IDE interface in all these three MRT hardware cards, and we can use this IDE interface to connect an IDE interface HDD. There is one IDE mode switch in the software, it will be available on ATA1 in MRT Pro & MRT Express while it is on ATA3 in MRT Ultra. And please noted that, when you correctly connect an IDE HDD and switch to IDE mode in software, even the power is not on, the BSY light will light up in MRT Ultra; while in MRT Pro & MRT Express, all the lights wont light up. The above all is the manual about installation of MRT card and how to correctly connect a disk to MRT hardware card, thanks for reading! |