WD 2.1.6.x Advanced Tutorial of WD USB Drives
|
Advanced Data Recovery Tutorial of Encrypted WD USB Drives Decryption video link of encrypted WD USB drives basing on old MRT version : https://us.mrtlab.com/video/wdcusbdecryptionen.rar
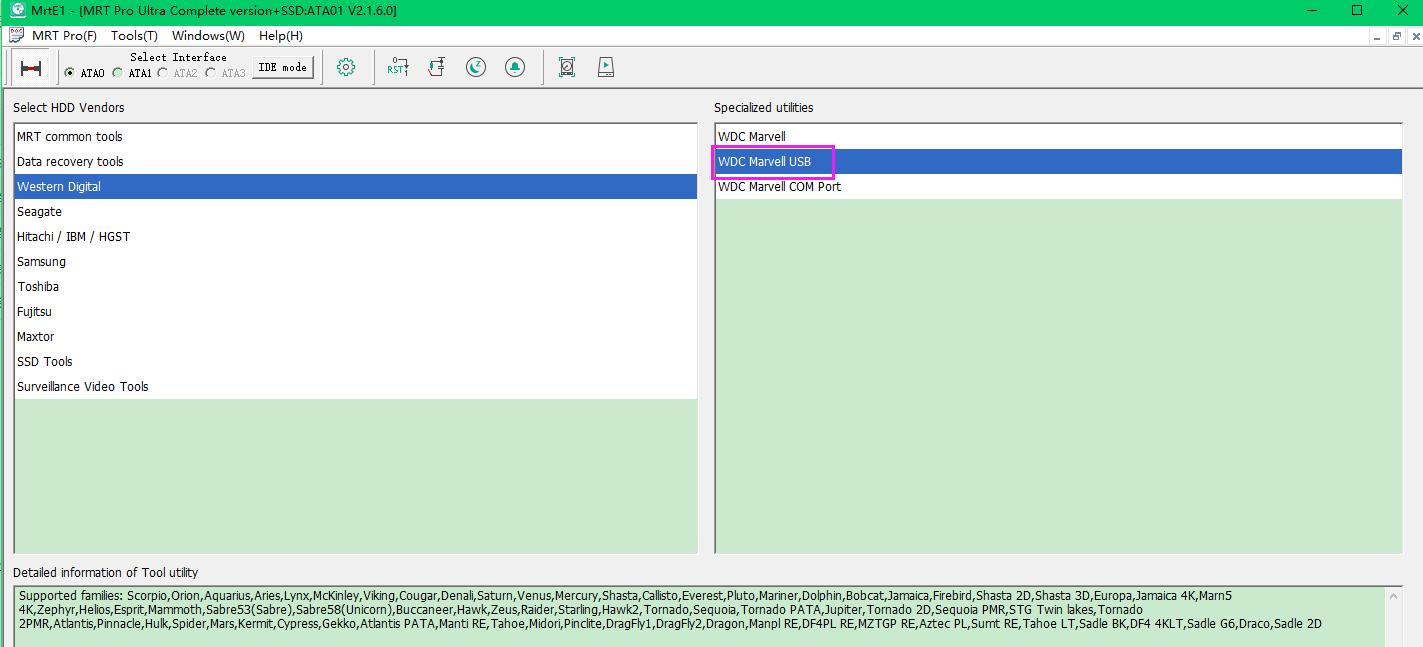
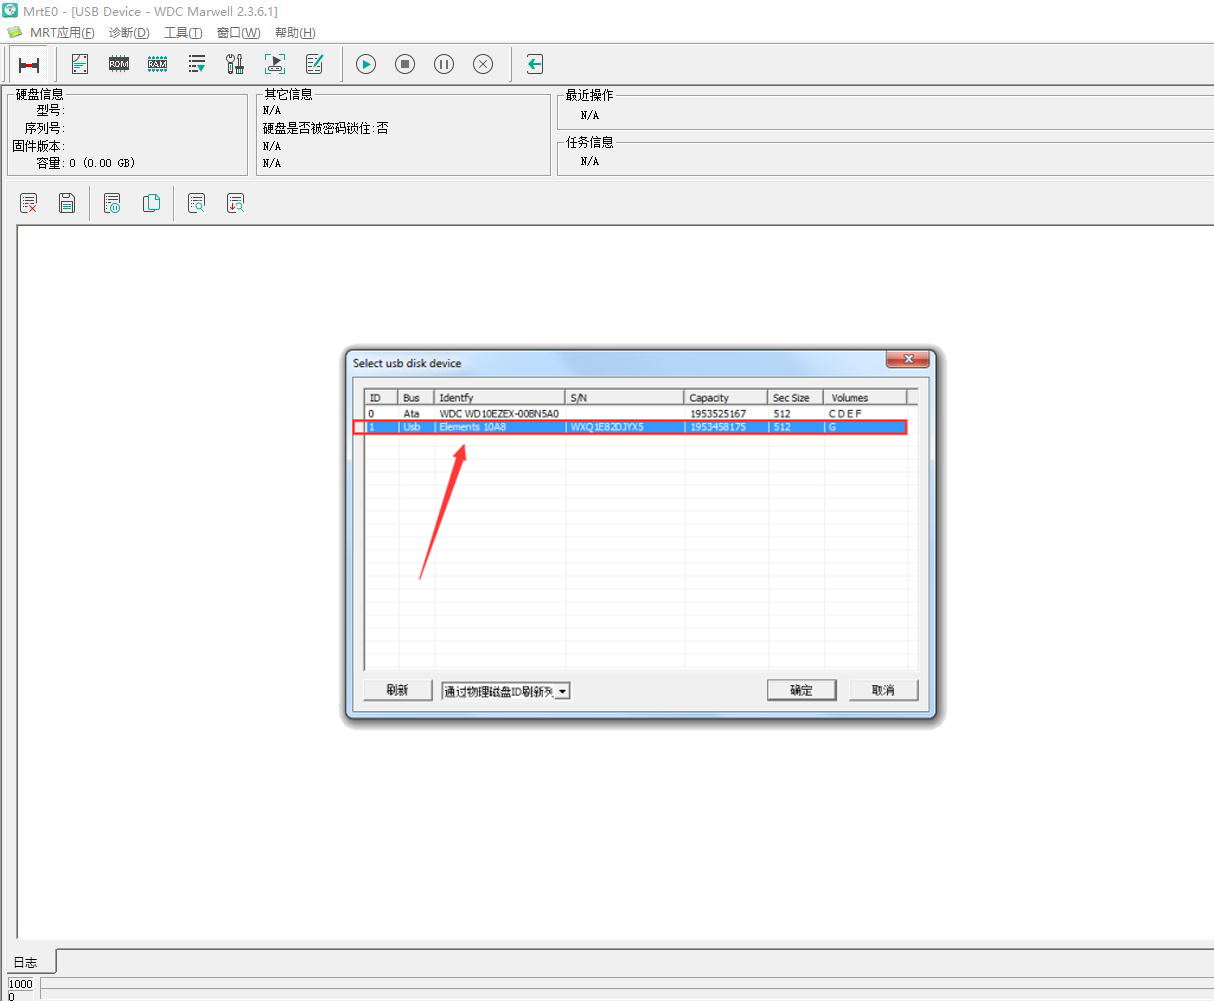
Currently, WD portable hard disks adopt interface of USB 2.0 or USB 3.0. And a USB cable is needed if we want to get stored data. One side of the cable is connected to portable disk, while the other side is connected to computer’s USB port. In MRT software, there is one special utility called WDC Marvell USB. The basic requirement when using this utility is that WD portable disk can be detected by operating system. That is to say, when the disk is connected to computer, it should be found in “Device Manager”, or we can not use WDC Marvell USB utility when it is undetectable in operating system. The device detection reuslt is shown as below:
WD portable USB drive is directly connected to host computer via USB cable, so that we can not execute operations like power off/on, soft reset, hard reset and skipping when native USB interface is used. When facing with bad tracks or bad sectors, the disk will keep long time busy or even get stuck, which will largely affect the speed and quality of the image. The example we have mentioned just now is the situation that the disk can be detected normally by computer, for those which can not even be properly detected by operating system, does it mean no any chance at all? Absolutely, the answer is no. When the above situations occur, we can try to convert USB interface into SATA interface, so that we can try to connect the disk to MRT hardware card. For disk with bad sectors, we can set error handling parameters in DE utility; for undetectable disk, we can try to fix it under firmware level first, then do the image.
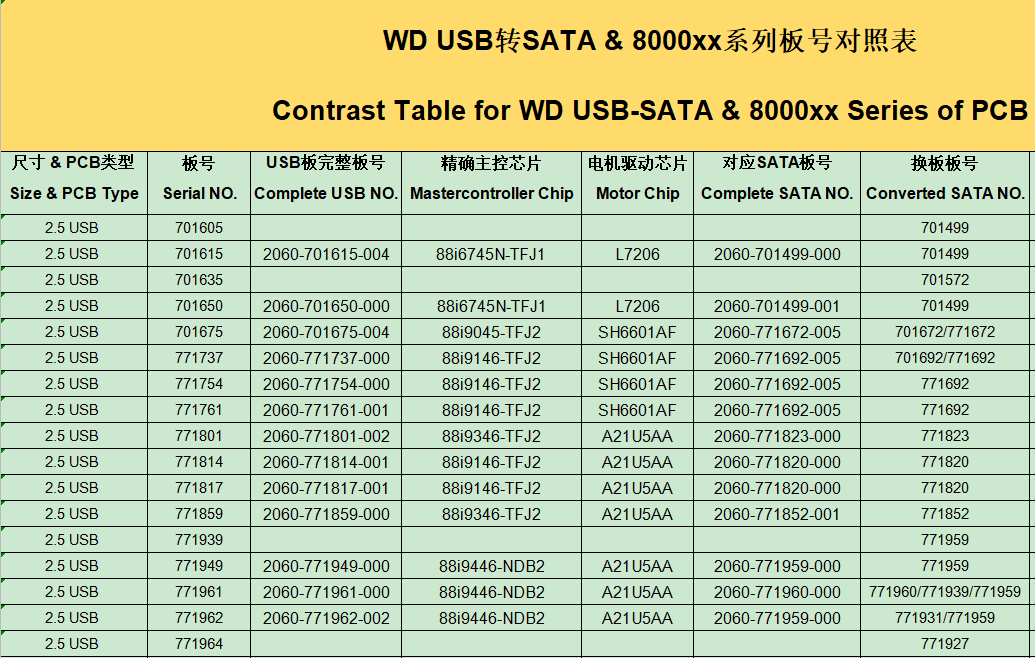
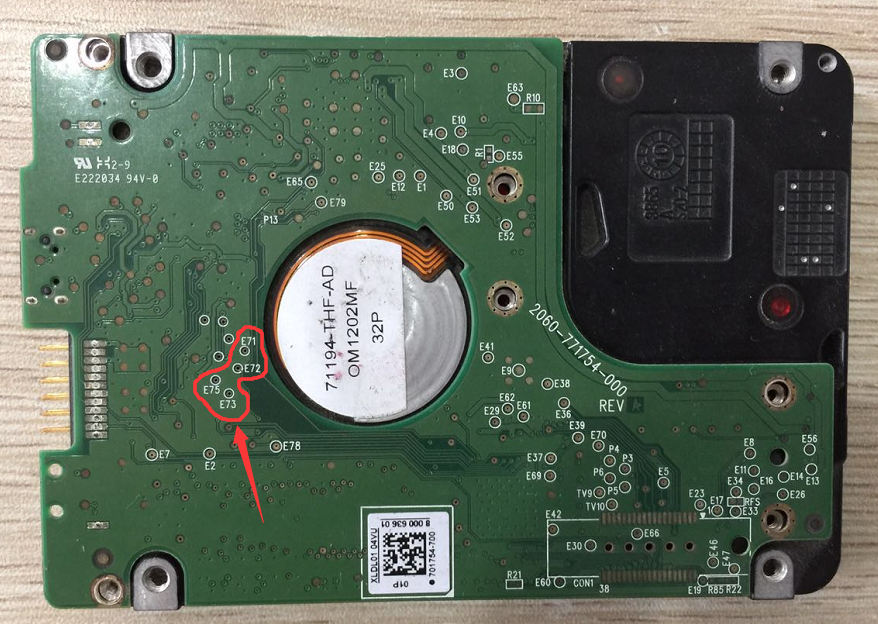
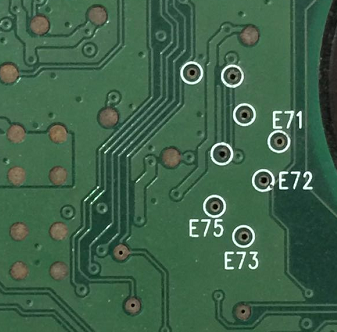
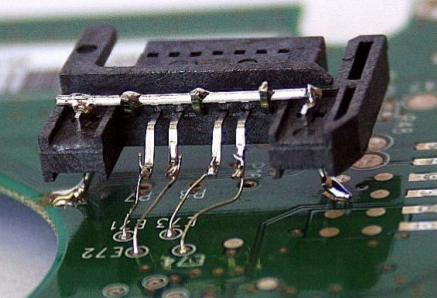
Part One: How to convert USB interface into SATA interface 1.The first method is to replace PCB board directly If we want to replace USB PCB board directly, we need to find the corresponding SATA board first. Here is the picture of comparison table of WD 2.5′ portable USB to SATA PCB number. To view more PCB numbers please refer to the link here: https://us.mrtlab.com/tech/wdc/310.html After getting corresponding SATA PCB board with same MPU chip, we need to remove the ROM chip from USB PCB board and then weld it to SATA board; or we can use programmer to read out the ROM data and save it, and use software to write the saved ROM data to the chip of SATA board. We need to screw up the SATA board in the end. 2.The second method does not need to change PCB board, but we have to solder wires. 1) Before soldering wires, we need to locate four points on the USB board, they are E71, E72, E73 and E75. The pins of these four points belong to ATA communication pins, as shown in the pictures:
2) We need to remove the capacitors of those four points from the PCB board with a heat air gun. The location of these four capacitors are shown as follows:
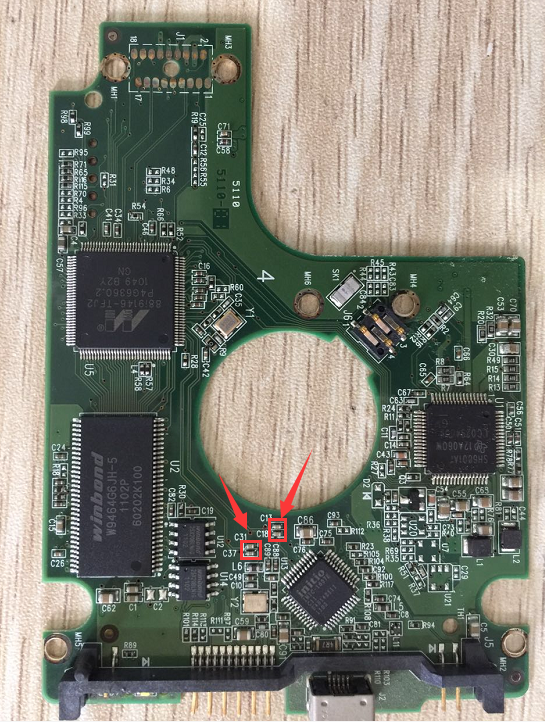
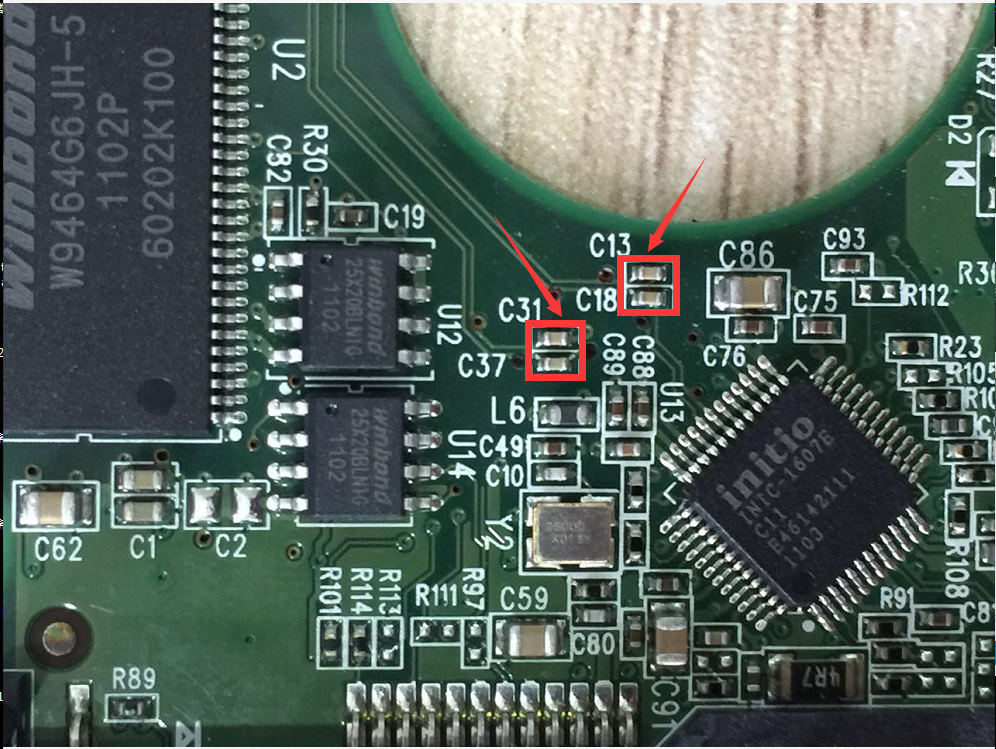
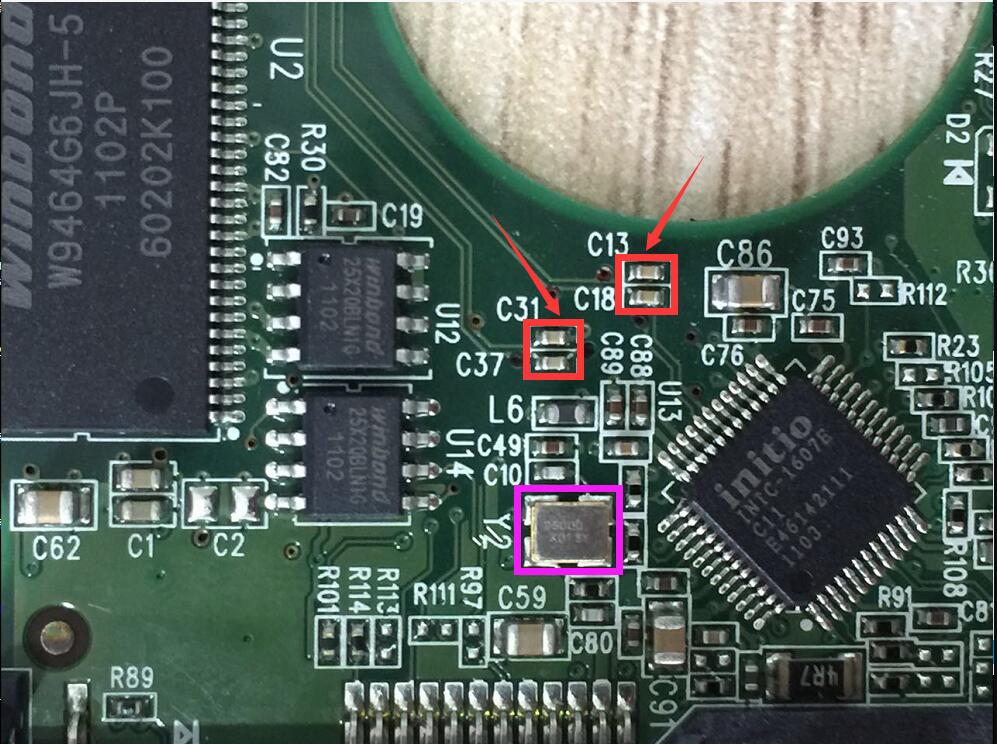
Attention: Sometimes we may find that the copy speed is unstable or head reads data normally for a while and then,all of a sudden,process gets stuck and then repeats the act. At this time we could consider desoldering the pink component in the below picture:
3) One more SATA data interface is needed. We can see that a SATA data interface has seven pins, three longest pins are ground electrodes, and the remaining four pins are data interface pins, of which pin 2 corresponds to E71 point, pin 3 corresponds to E72 point, pin 5 corresponds to E73 point, and pin 6 corresponds to E75 point. As shown in the picture:
4) Use wires to weld those corresponding pins and points together. After all operations are done, the real data can be transferred normally although copy speed may be a little bit slow.
Part Two: How to decrypt USB data after converting USB into SATA board? The detailed procedure has been introduced in the following tutorial link: https://us.mrtlab.com/tech/wdc/213.html
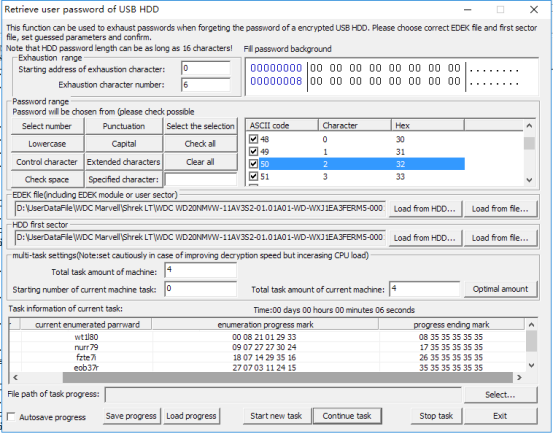
Part Three: How to retrieving user’s password of WD USB drives?
Preparation work for using the function: 1. Since the first user sector of a normally-used drive has a specified character “55AA” in the end, so the program will consider that the right password has been guessed if this character appears in the first user sector of the encrypted HDD when decrypting. Therefore, there should be the option “Load HDD first sector” when using this function. 2. What’s more, when WD Security is trying to decrypt the data, “EDED” data must be obtained. Then a new KEY will be generated combined with EDEK data and user password and it will be used to decrypt the correct data out. Therefore, there should be the option “Load EDEK file” when using this function. 3. Both the first user sector and EDEK can be obtained from the drive, but the needed first user sector should be the decrypted original one. Only in this way, can we get the correct data of the specified character when decrypting. We can use the way of converting USB PCB board to SATA PCB board to get the data and then save as a file. Then when using this function, we can select load from file, but this way will be more complex. |