Analysis and solutions of Init SMART fail
|
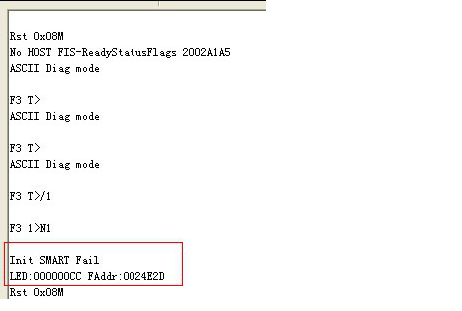
Analysis and solutions of Init SMART fail First all of, let's get a general understanding of SMART. SMART is short for "self-Monitoring, Analysis and Reporting Technology". It is one automatic status detection and early warning system and specification supported by modern disks. It can monitor the power-on hours, temperature, internal circuit, dielectric material on platter etc., as well as record the running log of disk in order to find out the possible problems of disk and send warning in advance to prevent from losing data. However, due to the constantly updated ATA standards, the threshold, the attribute value and maximum error value may be different among different models. As the disk will write log data to SMART modules when it is powered on, when recalculating translator or trying to read & write bad sectors etc., so the tracks which SMART modules located will be frequently modified, and this is the reason why those tracks can be damaged easily. The related SMART modules are module 09, module 0A and module 35 in Seagate F3 series. These three modules will record important information such as the wrong read rate, the number of power cycles, the number of reassignment sectors, the number of hard disk boot retries, the number of hard disk calibration retries etc. So once these modules are damaged, the hard disk can not running normally.And we should know that SMART modules damage is one common malfunction of Seagate F3 series. Now let's focus on the manifestations and judgement methods of SMART modules damage: 1. Hard disk can not be ready after powered on, it stays busy. This manifestation is similar to the situation when translator is broken. But the locations of these two malfunctions are different, so we need to distinguish them. 2. Can not clear SMART information. When trying to clear SMART information with command in terminal mode, it reports "Init SMART Fail" notice. As shown in the pic:
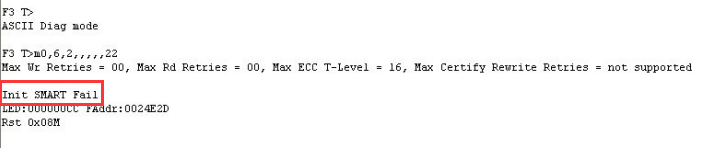
3. Can not recalculate the translator. When trying to recalculate the translator with command in terminal mode, this recalculation was failed with a notice of "Init SMART Fail". As shown in the pic:
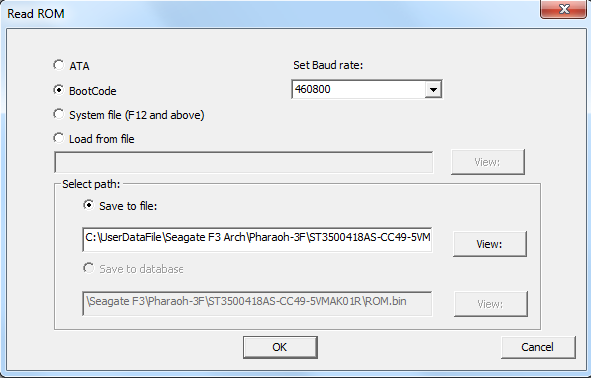
For the first manifestation, if we can exclude the possible reason of damaged translator, usually we can know the problem is associated with SMART modules. There will be two different situations when SMART modules are broken: the first one is that tracks where SMART modules located are with logical errors, and this situation we will explain later; the second one is that there are too many recorded entries, resulting in an overflow. For this second situation, actually the SMART tracks are all good, the wrong thing is the content within SMART modules, but this will also lead to a long busy problem of the disk. The solution for this situation is to clear SMART, then clear A-list and recalculate the translator, and this method is the so-called Seagate three steps . Among these three manifestations, the second and third one are most typical. We can confirm that SMART tracks are damaged by these two manifestations. As damage of SMART tracks can lead to the incomplete of translator recalculation, so we can not accomplish Seagate three steps. That is to say, when we meet cases like this, we need to repair SMART tracks first, only then can we do Seagate three steps to fix hard disks. In general, "Init SMART Fail" error is due to logical errors in SMART tracks. In our previous software versions, we can use "Track reading test" to deal with the problem. However, since version 2.0.1.2 of Seagate F3 Architecture, we have added one patch function in ROM tools which can fix "Init SMART fail" problem. This function is very powerful, it can modify ROM data and let disk skip the reading of SMART tracks, so it can recalculate translator successfully without "Init SMART Fail" error. Detailed steps of how to use MRT "init SMART Fail" patch function are as following: Open MRT software and enter into Seagate F3 Architecture, click "Tools->Firmware area object viewer->ROM tools", we can see there are four ways to read out the ROM in the pop-up dialog box, they are ATA, BootCode, System file and Load from file. We know that "Init SMART Fail" usually comes along with long busy problem, so we would like to recommend to use BootCode method to read the ROM out, and the baud rate is recommended to set to 460800.
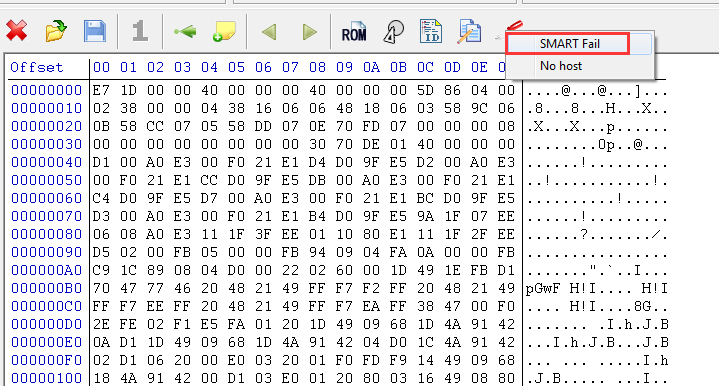
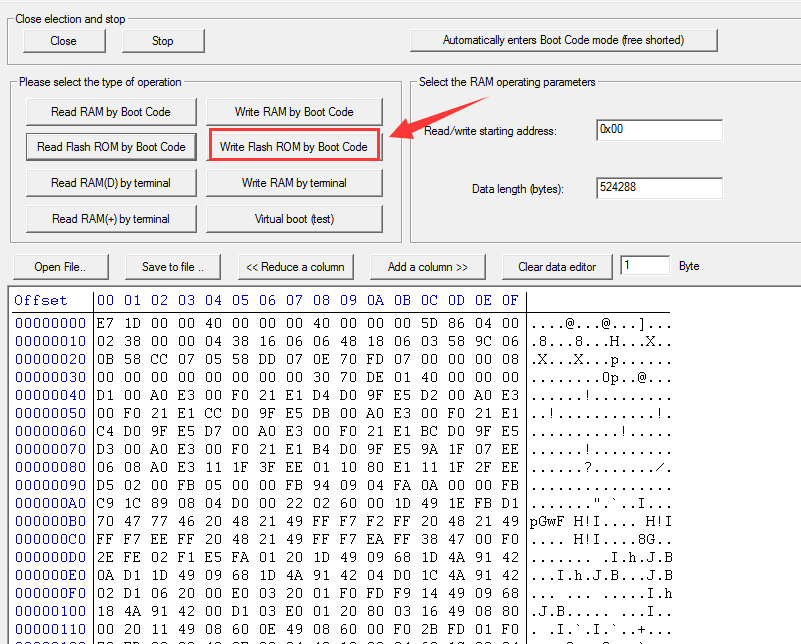
Once the ROM has been successfully read out, we click the icon of patch tool, and we can see there is one option named "SMART fail". It only needs one click on this option, then "Init SMART Fail" problem will be easily resolved. We need to save the patched ROM, and write this new ROM to disk via Boot mode tool.
After the writing is done, we need to power off and on, and when we try to recalculate the translator we can see there is no "Init SMART Fail" error notice, and there will return successful information of translator's recalculation. Till now, "Init SMART Fail" error has been successfully resolved. |