Data recovery base – 8. InsPro Disk and Winhex software tools
|
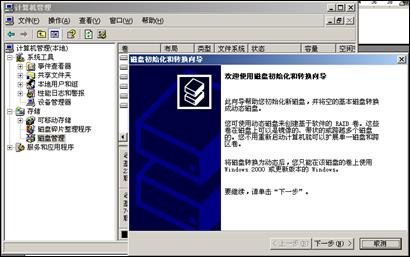 Figure 1.12 Initialize Disk Wizard
Note that the need to protect the data on the disk, remember to click the "Cancel" button, because the initialization be accountable to the number 0 sector write code.
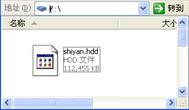
Then, you can see more than one disk management disk, shown in Figure 1.13.
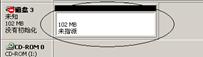 Figure 1.13 Virtual Disk
 1.4.2 Hex editing software Winhex
Winhex is a hex editing software disk under Windows, can be edited directly from the bottom to access the disk, and the disk contents, but also can be edited on the memory. With the upgraded version, more powerful. In addition, its data recovery capabilities also continue to improve, not only can perform basic data recovery, but also the reorganization array of RAID data recovery. Here we introduce it simple, for the convenience of the reader new to Winhex, we first finished version to its introduction as an example. But later chapters, more perfect than the English version will feature a new version is mainly used objects.
1. The main interface
Open Winhex, in the "Start Center" screen, click "Disk Editor" button (some versions may be translated as " open disk " ), or turn on the main interface, select "Disk Editor" tool button "Start Center" , as shown in 1.14.
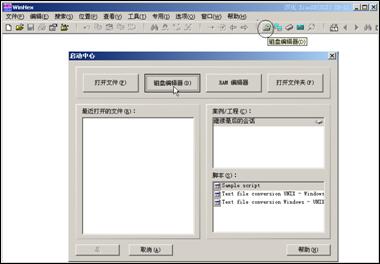 Figure 1.14 Start Center
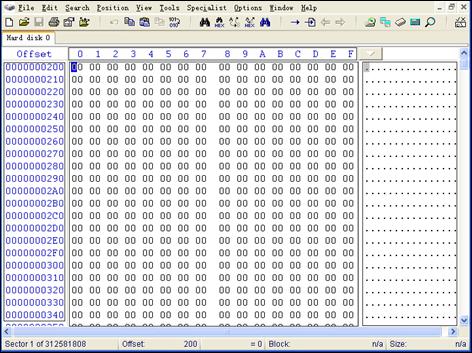
In the dialog box, select the "physical media" in the hard drive, you can open the physical disk. At this time, Winhex all sectors of the contents of the entire physical disk in hexadecimal form presented in front of us. In the disk interface 512 bytes per block was divided into a sector of each block, shown in Figure 1.15.
Figure 1.15 Winhex displayed in the disk sector
 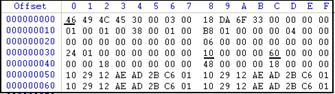
Figure 1.16 Schematic offset
We go back to Figure 1.15, on the main interface Winhex a brief introduction:
2 would be interpreted as disk mirroring
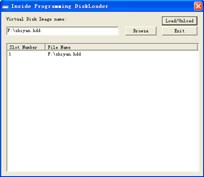
Winhex also supports directly open an image file, then the file will be interpreted as a disk.
(1) Select the image file you want to open. As shown in Figure 1.17, click the Tools button to open the file in Figure shown you can select the file path window appears, select the window you want to open the image file you can open it.
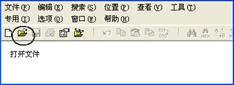 Figure 1.17 Open File tool button
(2) will be interpreted as a disk image file. After the file is open, select "Private" → "interpreted as a disk image file" menu command, you can directly open a disk reaches the same effect, as shown in Figure 1.18.
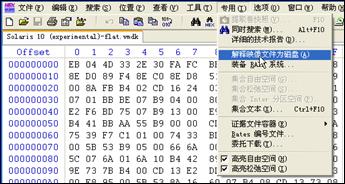 Figure 1.18 will be interpreted as a disk file
3. Making a disk image
Winhex can also be used to make the sector level disk mirroring. "Sector-level mirroring" is different from what we usually use Ghost software made "mirror", Ghost based on logic level mirrored file system exists only for the purpose of data operations. Sector-level mirroring is a "complete clone" approach, that is, from the physical sector level be copied to the sector on the original disk, resulting in an identical copy of the original disc, including the terms of the file system is not being used The free area is copied together. In this book, unless otherwise specified, "mirror" refer to this sector-level image.
(1) Open Winhex, select "Tools" → "Disk Utility" → "Clone Disk" menu command, you can pop up the "Clone Disk" Settings dialog box, shown in Figure 1.19, as shown in Figure 1.20.
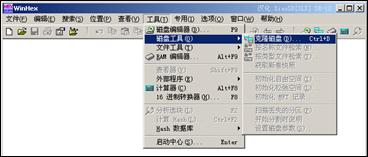 Figure 1.19 Clone Disk menu
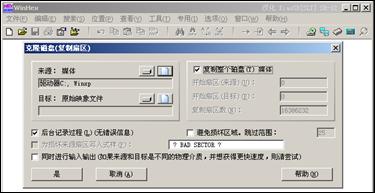 Clone Disk Settings dialog box in Figure 1.20
(2) select the image source. "Source: media" refers to going to be the source disk or file mirroring, under normal circumstances are mirrored disk, so choose the button on the left side of the disk
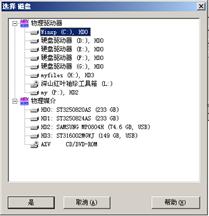 Figure 1.21 Select Source Disk
(3) Select the mirror target. Choose a good source disk, you can select "Target: The original image file" button in the left column of the disk clone disk to disk, you can select the right of the File button
4 Clear Disk Data
The reason the operating system on the disk is formatted, the data delete operation is not completely clear the data, which is likely to be restored data resides. But sometimes due to various reasons need to be completely clear of data, such as classified equipment to non-classified equipment, office equipment scrapped. Winhex provided us with data on the disk completely clear function, a direct destruction of documents, and the other is for disk underfill. Here we take a look at how to fill all bytes through the bottom of all data on one disk thorough cleanup.
(1) Select the starting position. On the first byte sector 0 right-click on the shortcut menu, select "Select block start" command, as shown in Figure 1.22.
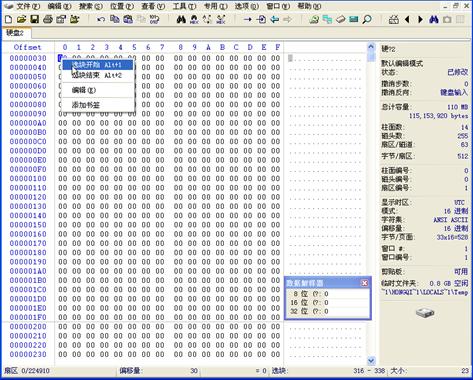 Figure 1.22 Select block start
(2) select the end position. Then pull the scroll bar to the last sector of the disk, right-click on the last byte in the shortcut menu, select "Select block end" command, as shown in Figure 1.23.
(3) set the parameters. Then, choose the block between the beginning and the end part will use a preset color display, which means that is selected. Right-click in the selected area, the shortcut menu, select "Fill election block" command, as shown in Figure 1.24.
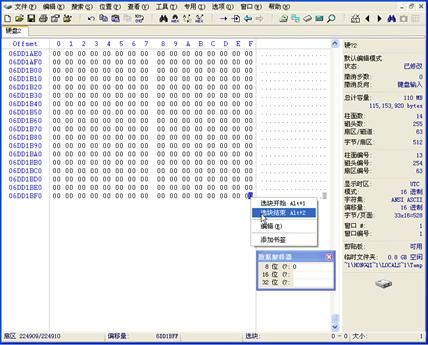 igure 1.23 End Select block
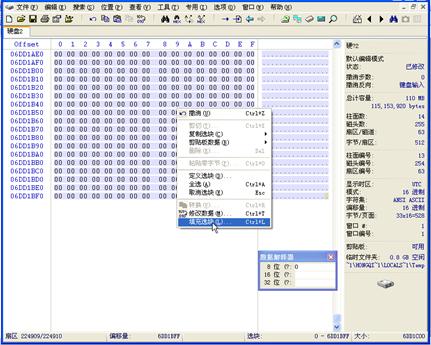 Figure 1.24 blocks filled with election
Pop-up "Fill election block" dialog box, select "filled with the hexadecimal value" (the default), the default "00" to fill, you can also specify any hexadecimal value, you can also select "filled with random bytes "At this time no law will be used to fill values. Here, we fill "in the numerical box 26 ", and then click the" OK "button, as shown in Figure 1.25.
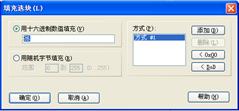 Figure 1.25 "Fill election block" dialog
Began to fill. In the pop-up dialog boxes are all warnings, click the "OK" button, which began filling, filling the entire disk after each byte is displayed as hexadecimal "26", which reached the original disk to the All data for the purpose of removal.
 5 Data Interpreter
Winhex have a "data interpreter" function, very practical, you can see directly the decimal value of hexadecimal numbers. Select the menu "View" → "Display" → "Data Interpreter" brings up a window data interpretation can click on the pointer to convert hexadecimal values directly. The default data storage order is Little-endian, if the object of the analysis is based on Big-endian order of storage, you can right-click on the data interpreter window, and then on the shortcut menu, select "Big-endian" or "big bit sequence "can, as shown in Figure 1.26.
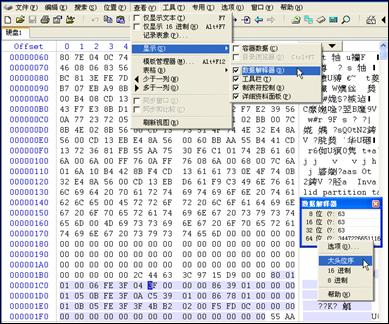 Figure 1.26 Data Interpreter

|