Analysis and solutions of Init SMART fail
|
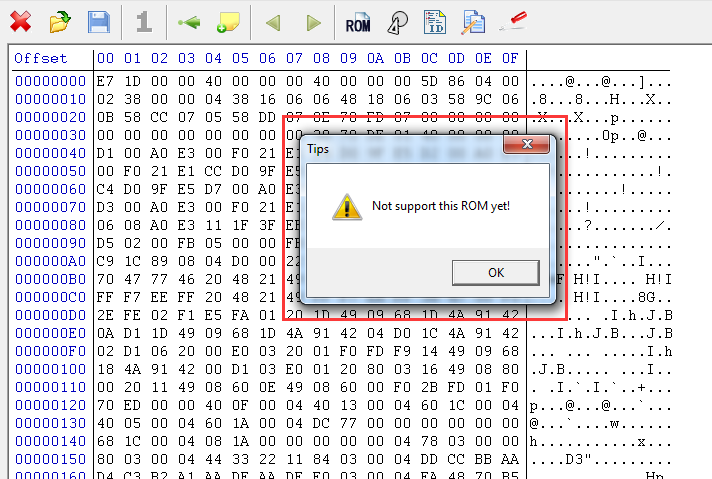
But sometimes when using this function, it might pop up a notice of "Not support this ROM yet".
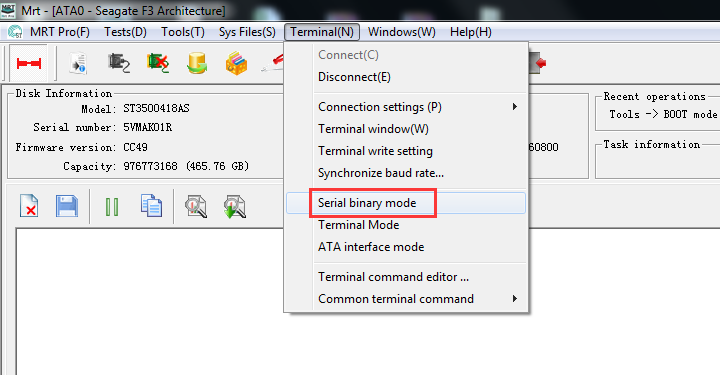
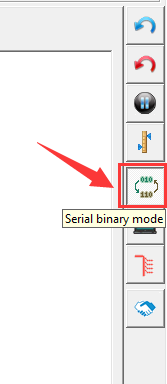
That is to say the ROM of this disk is not supported to patch. Then how can we solve "Init SMART Fail" problem on it? In our preceding part, we have mentioned that we can use "Track reading test" to solve "Init SMART Fail" problem. Detailed steps of how to use MRT "Track reading test" function: 1. Open MRT software and enter into Seagate F3 Architecture, click "Terminal->Serial port binary mode", or click the icon of "Serial binary mode" in rightmost part of the software interface. As shown in the picture:
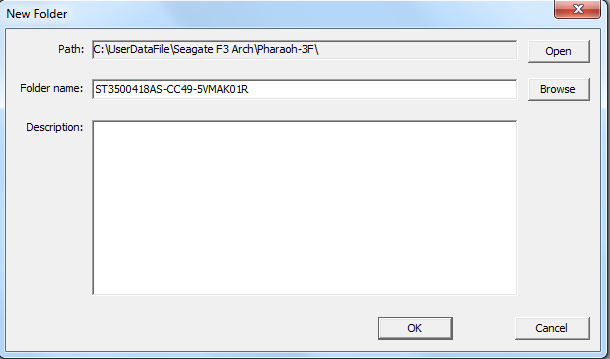
2. Click "Tools->Backup and restore tracks->Read SA tracks" to open the track reading page. If the user hasn't created working folder, there will pop up the dialog box of "New folder". As shown in the picture:
MRT software will create a working folder for each connected hard disks. All the firmware files of this disk will be stored in a working folder by default. If the disk can be identified, the working folder will be named according to the model, serial number and firmware version of the disk. If not, the folder will be named by the current time, meanwhile users can change the folder name to what they input. Click "OK" and the working folder will be created, at the same time, the tracking reading page will be opened. As shown in the picture:
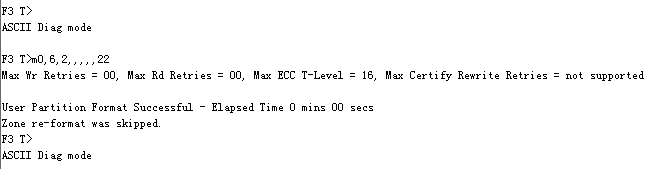
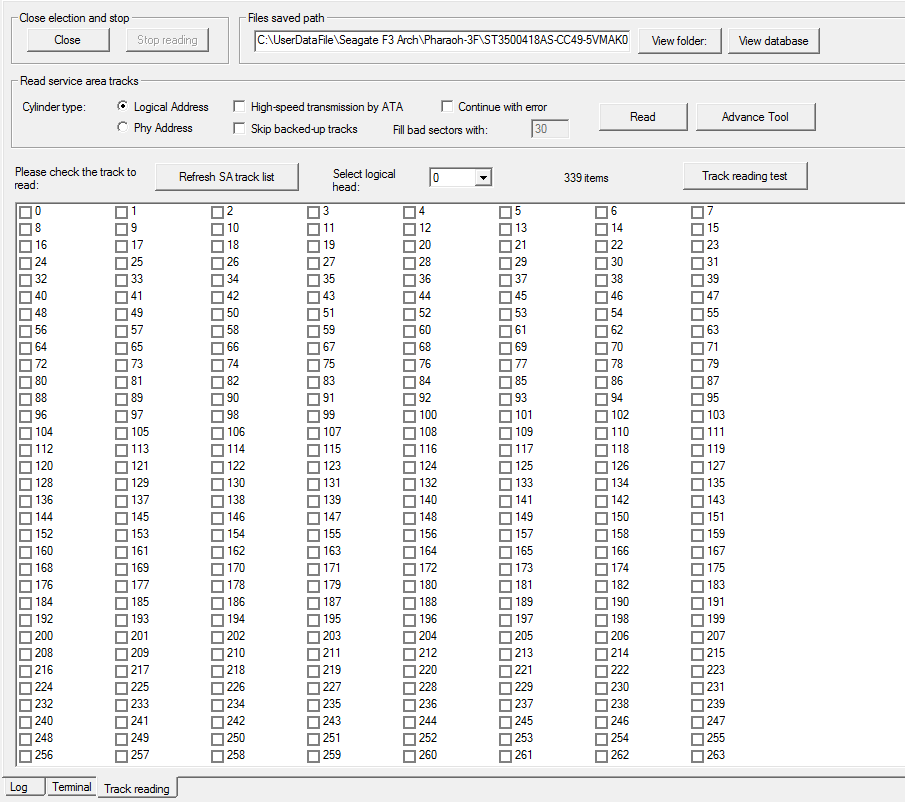
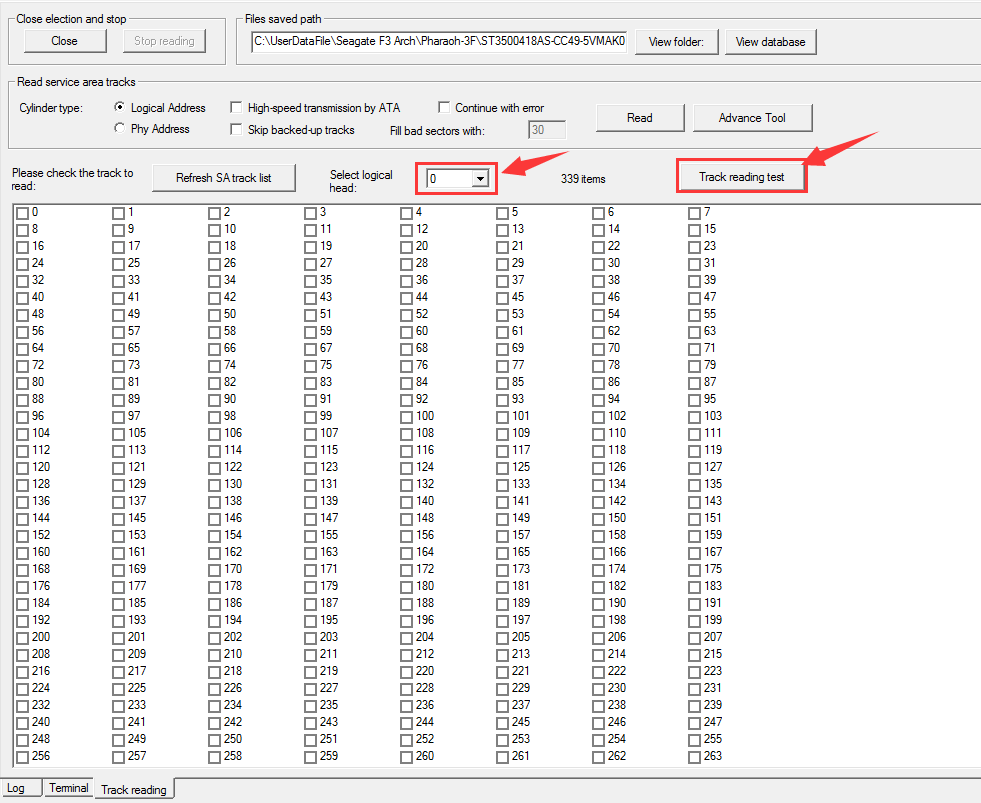
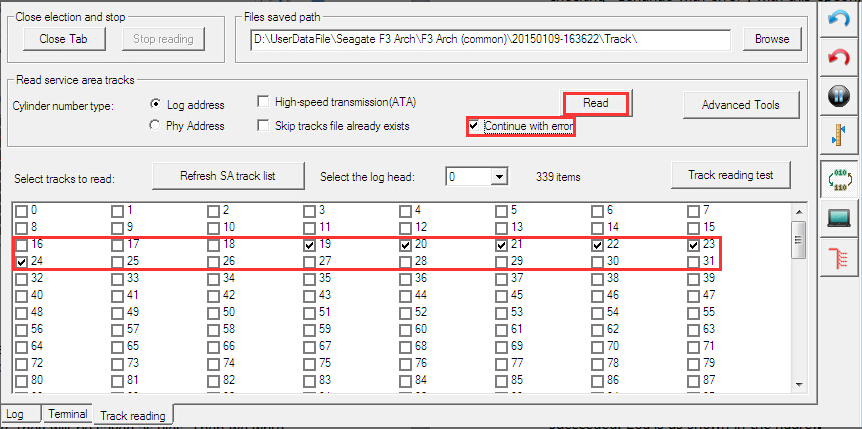
There will list all the SA tracks of this disk in track reading page. Please noted that all the tracks mentioned here are SA tracks. Users can select specified head in the list of "Select logical head", in this way, users can check the track list within each head. Generally, the needed firmwares run with Copy0, which are located within head 0, so we need to select head 0. Right click the track list and "Select all" so that all the SA tracks of head 0 will be selected. Then click "Track reading test". As shown in the picture:
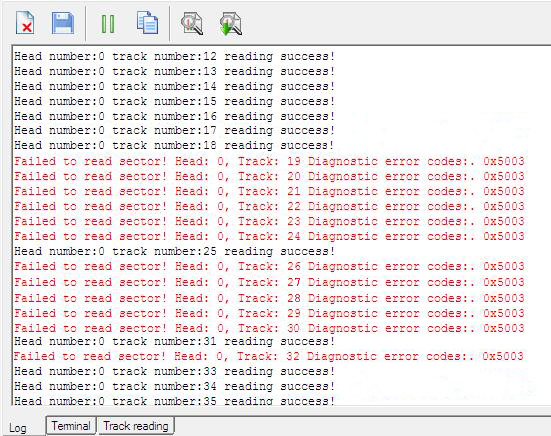
This step is commonly used to test SA. The purpose of it is to test whether there are unreadable damaged tracks and will list them out. The test result will be shown in the log interface. 3. MRT starts to do reading test for selected SA tracks. The unreadable tracks will be shown in red characters. Please noted that SMART modules of Seagate generation 12 usually locate at number 22 to 24 SA tracks of head 0. And the located SA tracks are different among different models, so we need to confirm the needed SA tracks according to the specified model. We can see the reading of these tracks are all failed. It can indicate the damage of SMART tracks. As shown in the picture:
In the above test, we can see that apart from number 22 to 24 tracks where SMART modules located, nearby tracks are also damaged. We need to repair those tracks. Please noted that SMART tracks are the most important parts, and they must be repaired. While the repair of other tracks is optional as there is no critical data in them. 4. Set the baud rate as 460800 then go to track reading page. Select number 22 to 24 tracks (other damaged tracks are optional), then click "Continue with error", last click "Read", as shown in the picture:
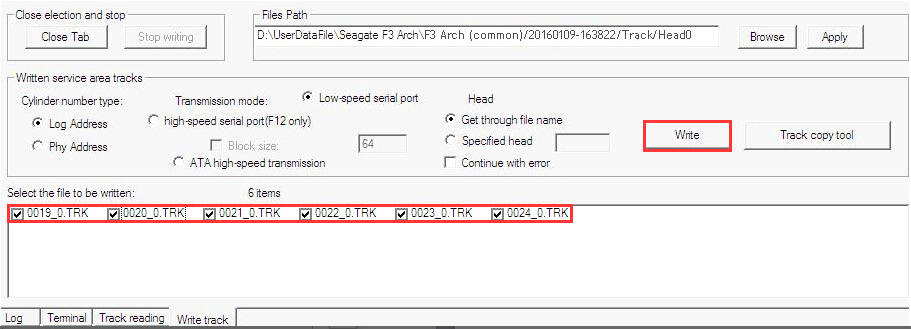
As those tracks needing to be read are damaged in some extent, so we need to click the option "Continue with error". At that time MRT will force to read these tracks and try to read out the data to the largest extent. The read-out tracks data will be stored as files in working folder. And bad blocks in the tracks will be filled with "!". 5. After the track reading is done, the data will be stored as files in working folder, and what we need to do is to re-write them to tracks. During the re-writing process, the disk will automatically recalculate the ECC checksum of each sector. When the damaged tracks are being re-written, usually they will come back to normal. Click "Tools -> Backup and restore tracks -> Write SA tracks", and track-writing page will pop up. There will list the previously read-out track data files on the bottom of this page. All these files are named in the format of "Track number_head number.trk". Select all the files and click "Write" to re-write those damaged tracks. As shown in the picture:
Note: If the disk can not be ready, SATA interface won't work. So we can not select "ATA high-speed transmission" as the transmission mode. But for Seagate generation 12 or later new models, they can support "Serial high-speed transmission" and we would like to recommend to click this option to enhance the writing speed. What's more, we recommend to click "Continue with error", because the program will force to write, and the repairing effect will be much better. 6. Wait till to track writing is completed. Once it is done, there will report the result on log interface, as shown in the picture: |